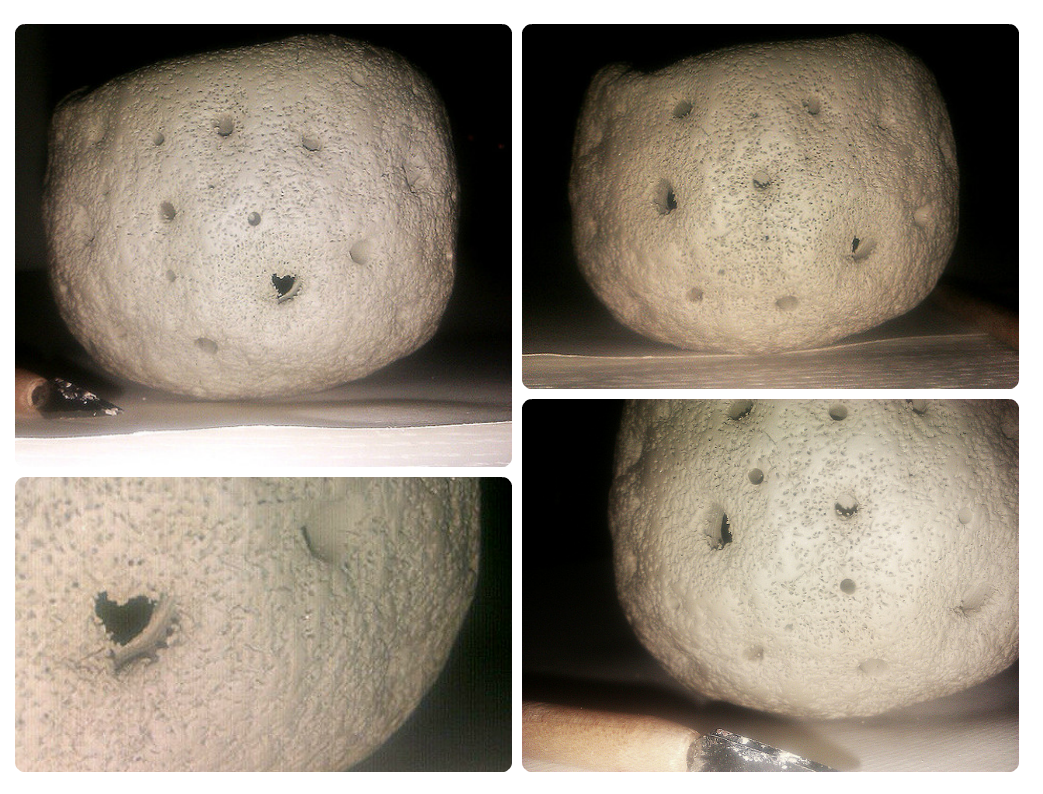
10 January, 2013
09 January, 2013
Day 9
Crack pot
This time I mixed two different types of clay, majolica and brown.
This particular brown clay has 25 % of chamotte and the grain size is 0-0,2 mm.
I persisted in creating cracks while at the same time
I had difficulty with forming the shape and I am not satisfied with this one.
It cracked a litte bit too much.
At one moment it almost fell apart complerely but I saved it!
This happens when you have problems with control
and when you are not able to stop at the right moment.
The edge of the pot was to thick so it cracked at some points during
drying. I then tore it completely so it can be equal.
08 January, 2013
Day 8
Crack pot
* Click for larger image
I started with shaping the majolica clay. It took me a while till I got
all the cracks and structure that I intended to achieve.
I overlaid the inside of the pot with brown clay.
Wonder what it will look like after the firing.
UPDATE: fired pot
*Click for larger image
Oznake:
bowl
,
brown clay
,
cracks
,
majolica
,
terracotta

07 January, 2013
Day 7
Hanging plant pot or candle holder?
Basic shape from the white clay.
I created simple surface texture and I highlighted it with engobes.
This will be a hanging pinch pot
therefore I punched holes from the side.
*Click for larger image
It can be a pot for some lovely cactus
06 January, 2013
Day 6
Crack pot
White clay, majolica clay,
iron and manganese oxide
For the start I added some majolica clay to the bottom of the pot.
And then I started to make cracks.
What I had in mind was to fill up the cracks with an iron oxide
and then when it dries completely to sand the surface of the pot with fine sandpaper.
It would reveal nice red cracks on smooth, white surface.
*Click for larger image
But somehow, I like it this way and I think I will leave the surface as it is.
Maybe I will sand just the inside of the pot.
UPDATE: Cracked on the way to kiln :(
05 January, 2013
Day 5
Crack bowl
Today I started working with pink clay.
I wanted to do some bigger and thinner pinch pot.
With chamotte clay that it's not so difficult because chamotte gives your clay the strenght.
The higher the percentage of chamotte is and the bigger the grain size is,
the stronger the clay will be.
*Click for larger image
This pink clay has 40 % of chamotte and the grain size is 0-0,5 mm.
At one point I added some white clay on the inside of the pot
and I continued with stretching and shaping.
Eventually the cracks were formed and I liked the effect.
I continued with this process until the clay was too hard for stretching.
It cracked, but not much.
This effect is something I could experiment with next time.
Maybe I'll try to make bigger cracks on different clay.
UPDATE: Cracked during firing :(
04 January, 2013
Day 4
Luminary
I was in a big hurry today, so much to do and so little time on my side.
I really don't like it when I don't have the time to work relaxed and without a pressure but
today was one of those days when things just don't go according to plan.
*Click for larger image
This supposed to have a little dandelions flower decoration. But...
*Click for larger image
This supposed to have a little dandelions flower decoration. But...
As you see, no sign of dandelions. I punched holes a little to soon,
because I didn't have time to wait for clay to harden.
In the end it got some kind of stone texture.
When I captured this photos I noticed a little heart on one.
I love when this coincidence occurs when you least expect it!
(especially when you are not satisfied with your work)
:)
UPDATE: After the firing
*Click for larger image
03 January, 2013
Day 3
Hanging luminary
I love to work with pink clay.
It has 40 % of chamotte so it's a little bit hard to shape in the beginning
but when you get a grip on it it's quite easy.
Chamotte clay dries faster than the regular clay
and sometimes that's really good thing, especially when you're
impatient or you don't have time to wait for it to become the leather hard.
I added some decorations in white clay and after I finished with it
the clay was hard enough so I started to punch holes.
I wanted to do something simple but...
*Click for larger image
I was so into it that I exaggerated with all the holes and the texture in general.
Not only that,
I also added some manganese oxide to some of the decorations.
I intended this pinch pot to be hanging candle holder.
I will leave it unglazed.
02 January, 2013
Day 2
Luminary
Today I was working with white clay
and experimenting with manganese oxide.
Texture is nearly the same to the one I made yesterday.
To be honest,
I have a lack of inspiration this days but I like it anyway.
It's another candle holder.
*Click for larger image
I used manganese oxide for the first time so I'm very excited about
what the fired piece will look like!
You can find more useful informations
about oxides and decorating here.
UPDATE: Fired luminary
01 January, 2013
Day 1
Majolica luminary
This is the first pinch pot I made for a project.
I am obsessed with candles so this will be a little candle holder. It's still unfired.
I was working with majolica and experimenting a little with texture.

*Click for larger image
At some point I will put the photos of finished, fired piece.
The images are not very good, sorry about that.
It will get better with time :)
I am obsessed with candles so this will be a little candle holder. It's still unfired.
I was working with majolica and experimenting a little with texture.

*Click for larger image
I partially put some yellow engobe on
textured surface and waited till it was leather hard so I can make holes for the light.
I will leave it unglazed.At some point I will put the photos of finished, fired piece.
The images are not very good, sorry about that.
It will get better with time :)
Oznake:
candle holder
,
engobe
,
lantern
,
luminary
,
majolica
,
pinch pot
,
terracotta

Subscribe to:
Posts
(
Atom
)